How to Place Your Wedding QR Code Sign (Table Cards, A-Frame, Ceremony Order)
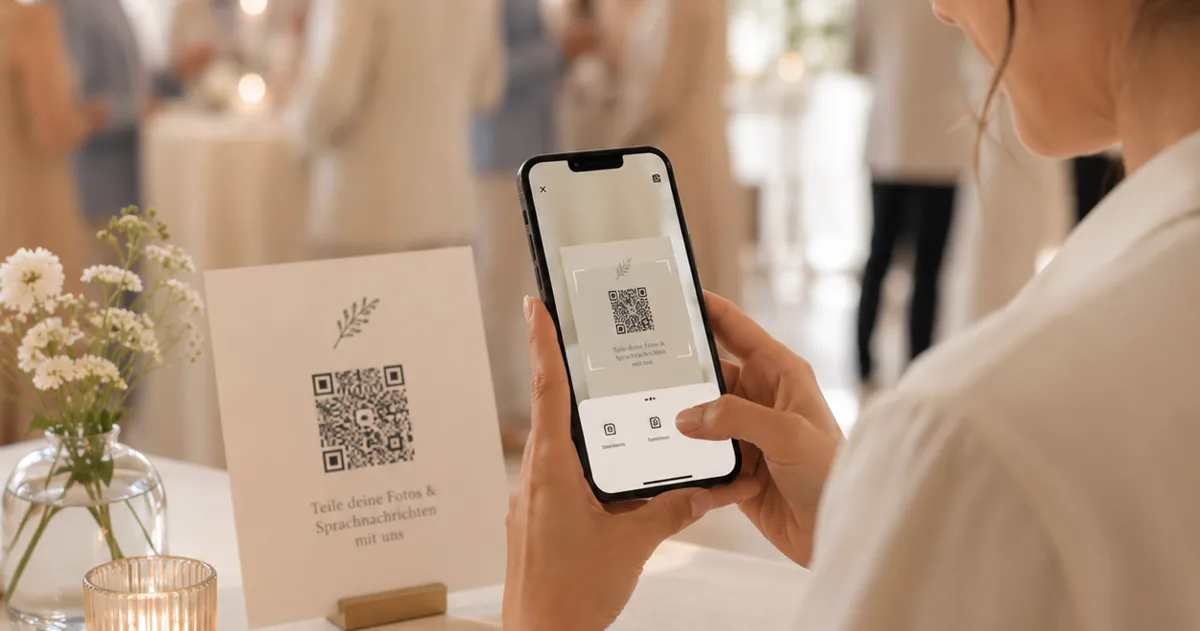
You have the QR code. Your guests will scan it, upload their photos and videos, and leave a voice message in your audio guestbook — no app, no signup, just their phone's camera. The only thing between you and a full album of the day from everyone's point of view is one quiet question: where do you actually put the sign?
It sounds like a small detail. It isn't. A code nobody notices collects nothing; a code too small to scan from a seated chair collects nothing; and a single sign by the guestbook table — easy to walk past on the way to the bar — collects far less than a code that meets guests at three or four natural moments through the day.
This guide walks through exactly where to place your wedding QR code, in the order your guests move through the celebration — ceremony order of service, reception table cards, welcome A-frame, and the spots couples forget — plus the print specifications that quietly decide whether a code scans on the first try or never at all. Nan included.
First, the one rule that makes everything else work
QR codes only work if guests can scan them and want to. Both halves matter.
The first half is mainstream by now. Around 97% of people in Germany own a smartphone (Statista, 2024), and 86.66% of smartphone users in the UK and Europe have scanned a QR code at least once, with 36.40% scanning at least one every week (MobileIron / Ivanti). Your guests already know what to do — the phone's native camera opens the code, and there's nothing to install.
The second half is on you, and it's the heart of placement: a sign has to appear where a guest is already holding their phone, with a moment to spare. That's why a single sign on one table underperforms. You're not decorating — you're catching people at the natural pauses in the day. Plan around those pauses and the scans take care of themselves.
Where to place your wedding QR code, moment by moment
1. The ceremony order of service
The order of service is the most overlooked QR spot at a wedding — and one of the best. Every guest holds it, most read it cover to cover while they wait for you to walk in, and that waiting time is the calmest, least distracted window of the day.
Print a small code at the foot of the back page with one warm line above it: "Captured a moment today? Scan to add your photos and voice." Guests who scan now will have the upload page ready the instant something happens, instead of fumbling for it during the first kiss.
One note of restraint: the ceremony itself is sacred, and you don't want a sea of phones during your vows. Frame the code as "for afterwards" — the drinks reception, the dinner, the dancing. It primes guests without inviting a wall of screens at the altar.
2. Reception table cards and table tents
This is the workhorse placement. A small card or folded table tent on every reception table puts the code within arm's reach of every seated guest, exactly when they have a lull between courses and their phone is already on the table.
Do not rely on one sign at the entrance for the whole room. One code per table — ideally two on long banquet tables — is the single biggest lever on how many photos you collect. Match the card to your stationery so it reads as part of the styling, not an afterthought taped to the centrepiece. A wedding generates a lot of phone photos — competitor data suggests a typical range of several hundred guest photos within 24 hours of a wedding (Snapeen, illustrative) — and the table card is how most of them reach you.
3. The welcome A-frame or easel sign
A larger standing sign — an A-frame, framed easel, or mirror sign — at the entrance to the reception sets the expectation for the whole evening: this is a wedding where you're invited to share what you capture. It's the first thing guests see, and it does the explaining so your table cards don't have to.
Because it's read from a distance and often by a small cluster of people at once, the code needs to be physically larger than your table cards (sizing below). Pair it with a headline — "Help us see today through your eyes" — and a one-line instruction. This is also the right place to mention the audio guestbook, the feature guests won't expect: "…and leave us a voice message we'll keep forever."
4. High-traffic stations and the spots couples forget
Guests queue at the bar and linger at the dessert table — idle-hands moments that are scanning gold. A small framed code at each high-traffic station catches people who breezed past their table card, and it's where the loosest, most candid photos of the night tend to get taken anyway. A few more easy wins: the save-the-date or wedding website for getting-ready and journey-in photos; favour tags or place settings that go home in a pocket and catch next-morning shots; and a thank-you card after the day reminding guests the album is still open.
Because your link stays live after the wedding, every one of these keeps working long after the band has packed up. With a tool like Gathmo, the album keeps gathering photos and voice messages for the full retention window of your plan — up to 2 years on the Grand tier — so a guest who finds a forgotten video a week later can still add it.
Getting the code itself right (the part that fails silently)
A beautifully styled sign with a badly produced code is worse than no sign at all, because nobody tells you it didn't scan — they just shrug and move on. These are the specifications that decide it.
Size it for the distance. The reliable rule of thumb is the 10:1 distance-to-size ratio: the printed code should be at least one-tenth of the distance it's scanned from (Uniqode). In practice that means:
| Placement | Scan distance | Recommended code size |
|---|---|---|
| Table card / table tent | seated, ~30–50 cm | ~3–5 cm |
| A5 stand / ceremony insert | ~40–70 cm | ~4–7 cm |
| A-frame / welcome easel | ~1–2.5 m | ~10–25 cm |
The absolute floor for any code is 2 × 2 cm (Uniqode). Below that, arm's-length scanning gets unreliable. When in doubt, go bigger.
Leave the quiet zone. Every QR code needs a clear blank margin of at least four modules on all four sides, mandated by the ISO/IEC 18004 standard (DENSO WAVE). On busy stationery this is the most common mistake: a floral border or script flourish that crowds the code and breaks the scan. Give it breathing room.
Keep it dark-on-light. Use a dark code on a light background (Dynamic QR Creator), and resist inverting it to light-on-dark for a moody look — many phone cameras struggle to read inverted codes (QR Designer). Aurum gold on cream reads beautifully; white on charcoal often doesn't.
Mind the logo. If you overlay a monogram in the centre, use the highest error-correction level (Level H, ~30% recovery) so the code still resolves with part of it covered (QRLynx). For a plain code with no overlay, Level M (~15%) is the usual default (DENSO WAVE).
Export sharp and test-print. Print at 300 DPI or higher for close-range stationery (QR Insights), and — the rule that saves weddings — always print one proof at the real size and scan it yourself, from the distance and lighting your guests will use, before ordering the full run (Uniqode). A code that scans on your monitor can fail on glossy card under candlelight.
Use a dynamic code. For event materials you may print weeks ahead, a dynamic QR code points to a link you control, rather than baking the destination permanently into the pattern (Scanova). Gathmo's wedding codes are this kind — the QR and the short link (gathmo.com/c/CODE) route to your album, so the sign keeps working even as your album fills.
Download the QR code at the correct size for each placement
From the Gathmo dashboard, download the QR code as SVG (scales to any print size) or PNG at 300 DPI. You need different sizes: 3-5 cm for table cards, 10-15 cm for A-frame signs, and 20-30 cm for ceremony order displays.
Place a table card at every table
One 3-5 cm QR code per table card is the primary placement. Position the card where guests can reach and scan it from seated: near the centrepiece or the favour, not at the far edge of the table. Test-scan from a seated position at actual table height before the wedding.
Position the A-frame or standing sign at the reception entrance
Place a large sign (15-20 cm QR code) at the entrance to the reception venue so guests see it as they arrive. This primes them to use it and is often where the first uploads happen. Back it with the instruction 'Scan to add your photos -- no app needed.'
Add a ceremony placement if guests bring phones
If guests are welcome to photograph during the ceremony, place a small sign or card near the ceremony exit with the QR code. Ceremony uploads of candid moments are often the most valuable photos in the final collection alongside the professional images.
Frequently asked
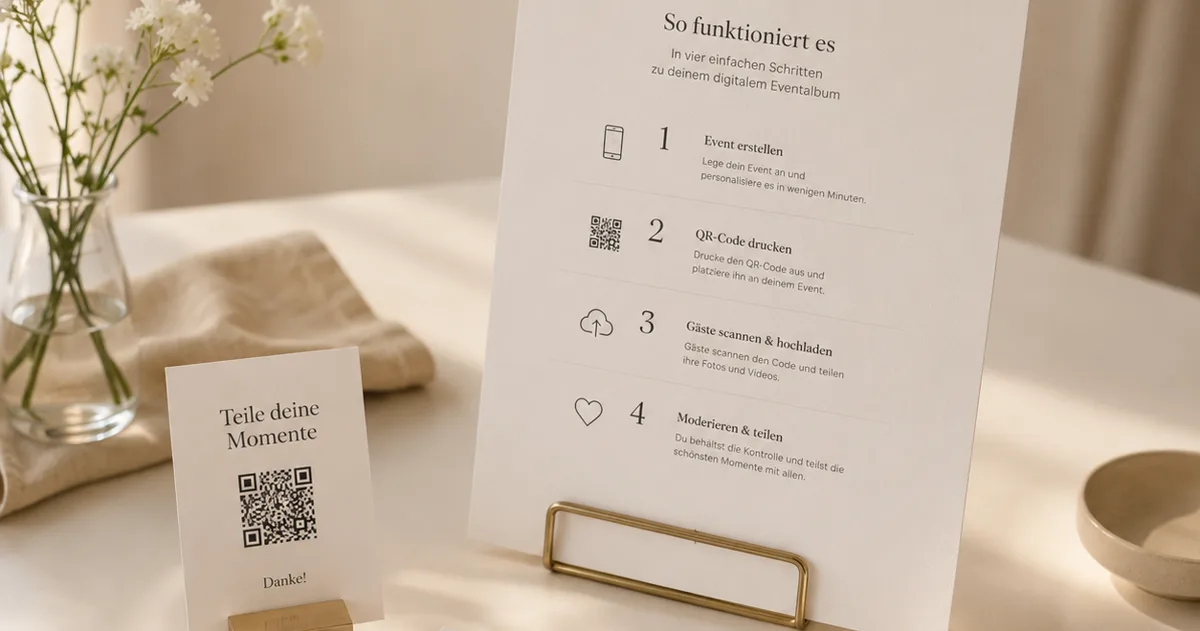
You create your wedding album and the tool generates the code and a matching short link for you. With [Gathmo](/weddings) you start free, add your event, and download a ready-to-print QR code in the Aurum wedding style — guests scan it straight into the upload screen in their phone's browser, with no app and no signup.
Match the size to the scan distance using the 10:1 rule: roughly 3–5 cm on a table card scanned from a seated chair, and 10–25 cm on a standing A-frame read from a metre or two away (Uniqode). Never go below 2 × 2 cm.
On every reception table first — that's the workhorse — then a larger welcome A-frame at the entrance, a small code on the ceremony order of service, and a few at the bar and dessert table. More natural placements means more of the day captured.
No. Modern phone cameras read QR codes natively, and with Gathmo there's nothing to install and no account to create — guests scan and they're on the upload page. That "no app, no signup" promise is exactly what keeps your most tech-shy relatives included.
Five high-impact placements: (1) on every table card — this reaches every seated guest without requiring them to seek out a sign; (2) on the bar — a natural waiting-moment location where guests are receptive; (3) on the welcome sign at the entrance — captures guests before the ceremony; (4) on the back of the order of service — guests hold this during the ceremony and will scan at a quiet moment; (5) on the dessert or candy table — a sweet-spot moment when guests are relaxed. The single most effective placement is the table card because it is inescapably in front of every guest at dinner. One placement alone still leaves out the half of guests who do not notice a single sign.
Three design approaches: (1) a printed calligraphy card matching your stationery suite, with the QR code inset in one corner — the most cohesive; (2) a small wooden sign with an engraved or printed QR code — works well for rustic and outdoor venues; (3) a simple table tent card with the QR in your wedding palette and a one-line instruction. Avoid dark backgrounds — light code on dark prints tends to fail on phone cameras. Always leave a white quiet zone (blank margin) of at least 4 modules around the code. Print at 3 cm minimum for table-card scanning distance. Match the style of your menus and place cards and the QR sign becomes part of the decor rather than an afterthought.
The single highest-impact placement is one QR card per table seat — not a single sign at the entrance. Close proximity (within arm's reach) drives participation more than any other placement variable. Beyond table cards, four additional placements: back of the menu card; inside the order of service; favour bag tag; and the bathroom mirror or door. An entrance display or cocktail hour sign is a useful secondary reminder but should not be the primary placement. At table-card scanning distance (30 to 40 cm), the QR code needs to be at least 2 cm square. Test the printed card before the wedding day — dark or low-contrast backgrounds can prevent scanning reliably.
 Story
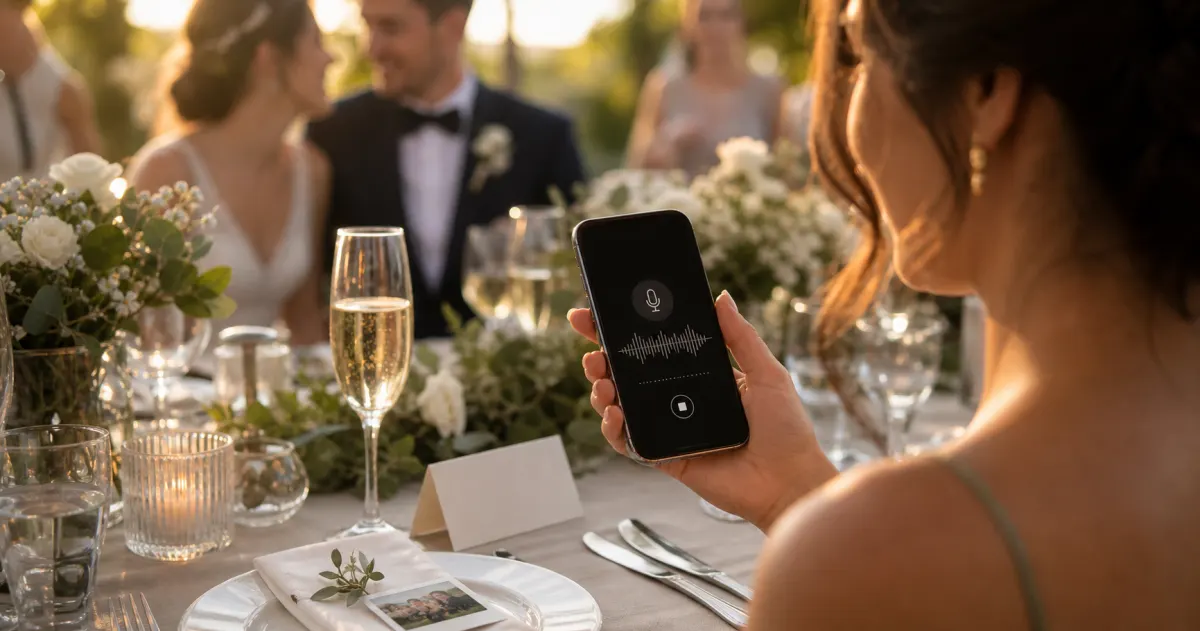
StoryThe most underrated wedding keepsake: guest voice messages
Guest voice messages are the wedding keepsake couples replay most -- real voices, real pauses, the things people said when they actually meant them.
 Ranking
Best wedding guest photo apps of 2026
We compared the wedding guest photo apps couples actually use -- on price, friction, and what you keep afterward. Our ranked best-of for 2026.
 Guide
GuideAudio guestbook for weddings: skip the rental
An audio guestbook used to mean renting a retro phone for hundreds of euros. How to collect wedding voice messages with a QR code instead.